
This article explains how to manage soft and spam bounces in your email communications, and how to set up a Dynamic Segment to suppress the contacts affected.
What are soft and spam bounces?
Soft and spam bounces are temporary delivery failures, meaning future sends to these recipients may still be successful.
To prevent ongoing deliverability issues, Force24 automatically updates a recipient's email status to bounced if they experience six consecutive soft or spam bounces within six months.
Spam bounces often increase due to mailbox providers blocking emails in response to high hard bounce rates. These blocks are usually temporary and resolve themselves as hard bounces decrease.
What is the best practice?
To protect deliverability, it's best to reduce sending to recipients who have spam bounced and apply the same approach to soft bounces.
Temporarily removing these contacts from email sends helps prevent them from reaching the bounce threshold, ensuring better long term deliverability.
How do I identify the spam and soft bounces?
In order to temporarily suppress these contacts, they first need to be identified and housed somewhere to be monitored. Using Dynamic Segments ensures we're able to monitor these, and will act as the suppression Segment.
- First, create your Segment, using a consistent naming convention such as Suppression - Soft Spam Bounce. This allows you to always easily identify any suppression Segments you have if more are created.
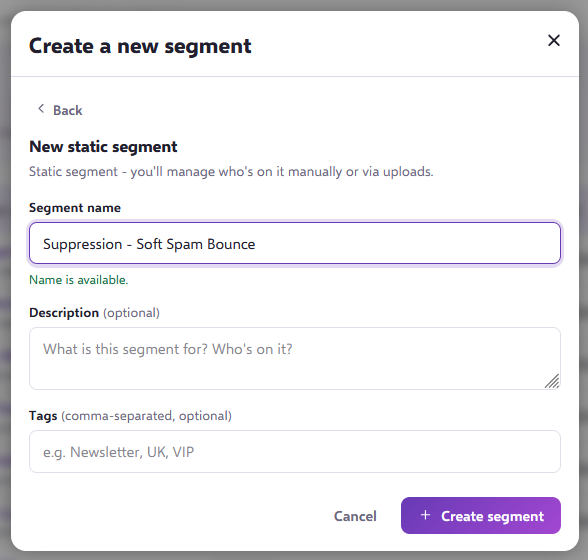
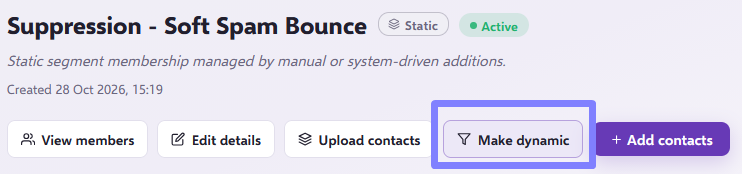
- Next, select Make dynamic at the the top of the list .
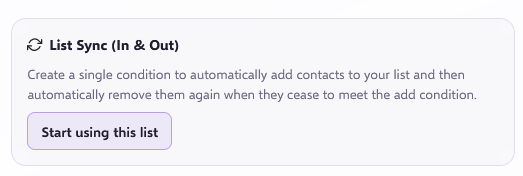
- Select List Sync (In & Out), which will automate the segment using Query Sync. This means the rules you add in the Add conditions area will bring in contacts, and when contacts don't meet them anymore they'll also be removed from the Segment.
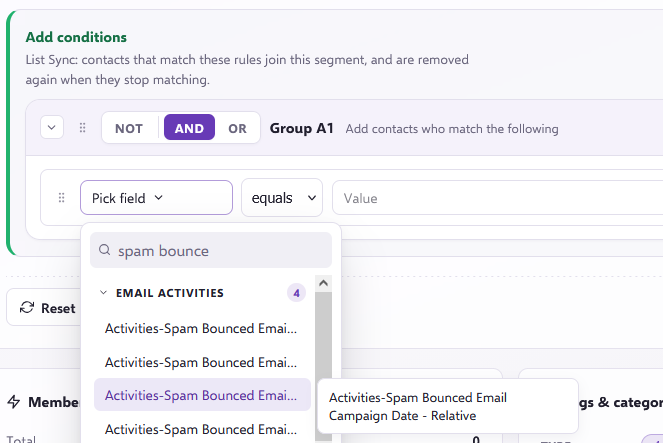
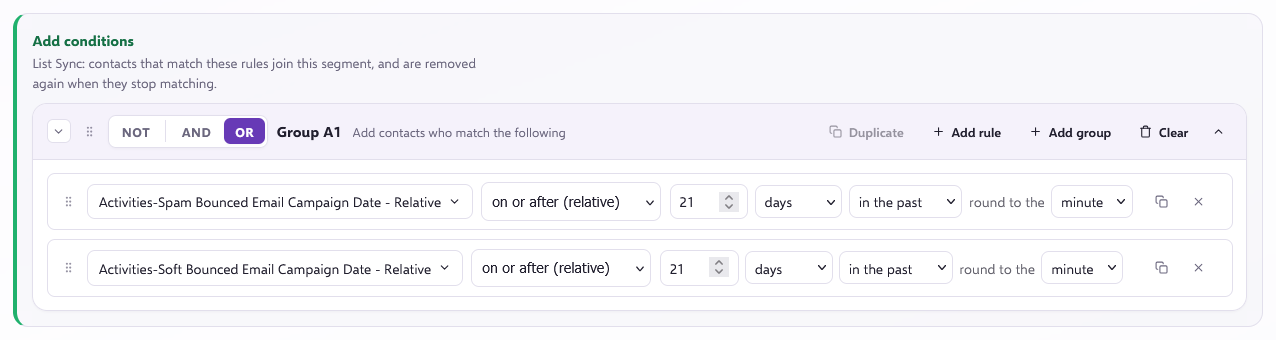
- From the drop down, type spam and the options shown in the screenshot will appear. Select the option Activities-Spam Bounced Email Campaign Date - Relative.
- Next, select the drop down that says is yesterday and update this to on or after. You'll then want to update the following options to be the number of days or months in the past that best suits your requirements. A good starting point is 21 days, but if we're still seeing repeat soft or spam bounces, this can be extended further.

- This needs to be repeated for soft bounces. Add another rule, but search for soft, then select Activities-Soft Bounced Email Campaign Date - Relative. You'll then need to update the AND operator to OR. Then click the refresh button in the bottom right hand corner to see the Found Contacts. This displays the number of contacts that meet the requirement for the rule you've set.
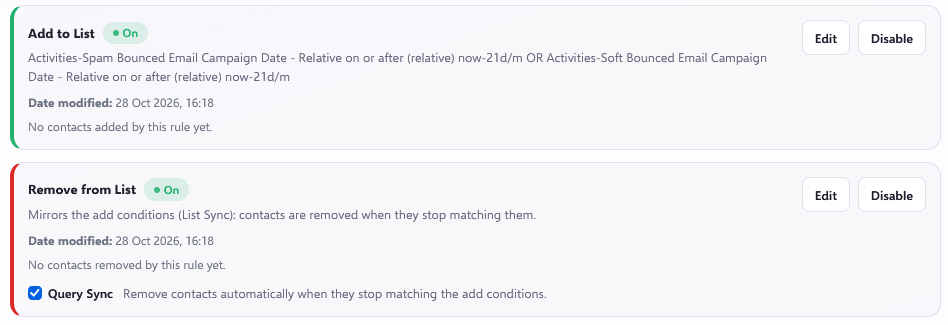
- Make sure the tick box for the query sync is selected under Remove From List. Once this has been applied, click Save Smart Audience. You'll now have the option to activate the Segment using the Activate Smart Audience button at the top of the page.
How do I make sure these contacts are suppressed?
The Segment with the contacts that have recently spam or soft bounced will need to be suppressed when setting up single sends or Journeys. The methods for both are shown below.
Journey Manager
Within the start audience Audience Rules section, first make sure the contacts you want to send to are identified using a rule. In this example, a Segment (Dummy Marketing Contacts List 1) is being used to identify the contacts to go through the Journey. Select + Add group in the top right hand corner, and include the suppression Segment. Next select NOT. This ensures that no contacts are added that exist within that Segment, and this method can be used regardless of the complexity of the start audience. Make sure the top level operator is always AND and no other option is selected.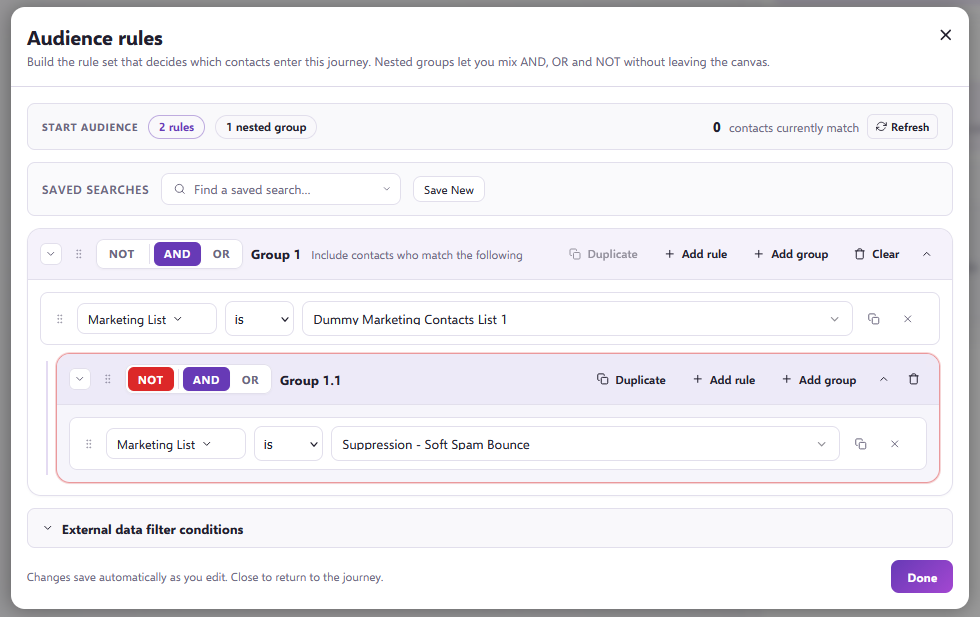
Within the Journey, use a simple decision as the component before any email send after the first email, so this is checked just before the campaign send. You can have the contacts removed from the Journey if they are within the Segment.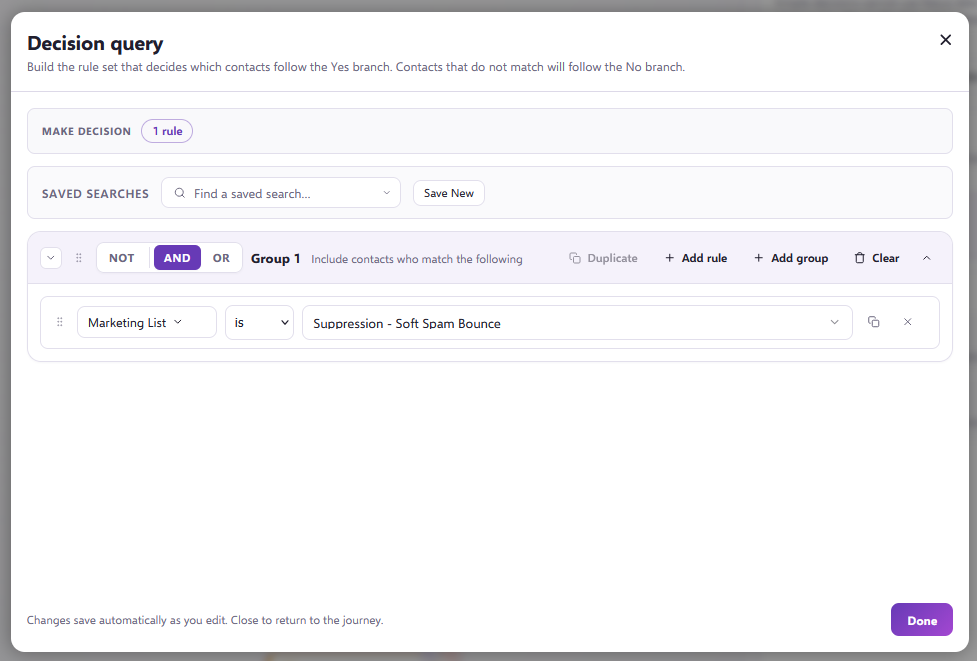
Single send campaigns
With single send campaigns, run the same query shown in the start audience, but carry this out within Contact Search. From there, select the Segment option at the bottom of the Contact Search results and have the contacts added to a new Segment, which will be used for the send.
Still need help?
If you have any questions, get in touch through the live chat in the bottom right corner of your Force24 platform. Our team will be happy to help.