A 'Test Marketing List' is a marketing list with a status 'Test'. This allows it to be called from within the template test facilities.
This is a quick way of testing an email template to a number of internal users quickly.
Simply follow the below steps
- Step 1: Ensure you have created a contact
- Step 2: Add this contact to a 'test' marketing list
- Step 3: Turn the 'test' list into a test list
Step 1: Ensure you have created a contact
The first step is to add/find your contact by using the 'Add Contact' shortcut at the top of the platform
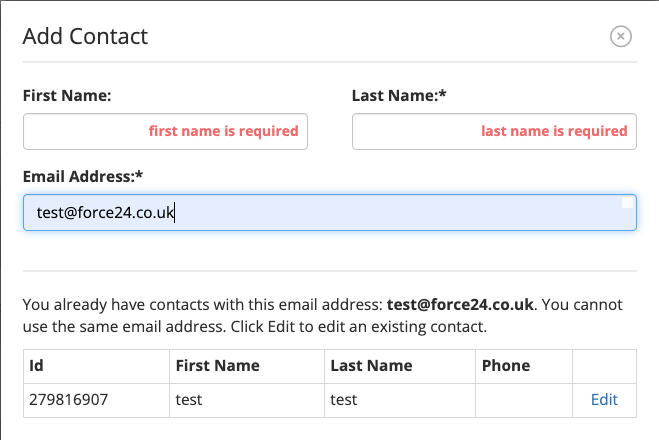
The 'Add New Contact' pop up will appear

Before proceeding, please ensure that you provide an email address. The system will verify whether the contact you intend to add already exists.
If the contact already exists, the system will prompt you to decide whether you would like to edit the existing entry. Duplicate entries are not permitted, as the email address serves as the unique identifier.
Step 2: Add this contact to a 'test' marketing list
After entering all the necessary contact information, you can proceed to add the user to a Marketing List.
To do this, click on the plus icon next to the Active Marketing List. If you have already created a list to which you want to add the contact, start typing its name in the Marketing List input field.

If you haven't created the Marketing List yet, you can provide a new list name in the designated field, and the system will generate it for you.
As you type, if the list doesn't exist, it will be highlighted in a full red colour (refer to the screenshot below). Click on the red section, followed by the 'Add' button to proceed.
 Subsequently, a pop-up window will appear, asking for confirmation if you want to add this contact. Click on the "Confirm" button to proceed. The contact will now be successfully added.

Step 3: Turn the 'test' list into a test list
You should now see the test list showing as an active List for this contact

To proceed, click on the highlighted blue name of the marketing list. This action will open the marketing list, where you will find a toggle that allows you to switch the list from being a 'live' list to a 'test' list. Simply toggle the switch to the 'test' position.

Now, this list will be visible when you select 'send test' within the platform, enabling you to test the email with ease.
If you wish to add other internal contacts to this list, you can follow the same process. When adding to the active marketing list, begin typing, and the marketing list name should automatically appear for selection.
We highly recommend testing the email with different Email Service Providers to ensure it renders as intended. This will help you ensure optimal email performance across various platforms.
If you have any questions, feel free to reach out to us through the live chat function available bottom right in your Force24 Platform. Our team is ready to assist you and provide support whenever you need it.