To find out how to build your form using our Form Builder, please have a look at our article here:
Once your form has been created, you need to specify where you want your fields to be mapped to in the Force24 portal. You need to go to the top of the page in the form you're editing and click 'Submission Mapping'

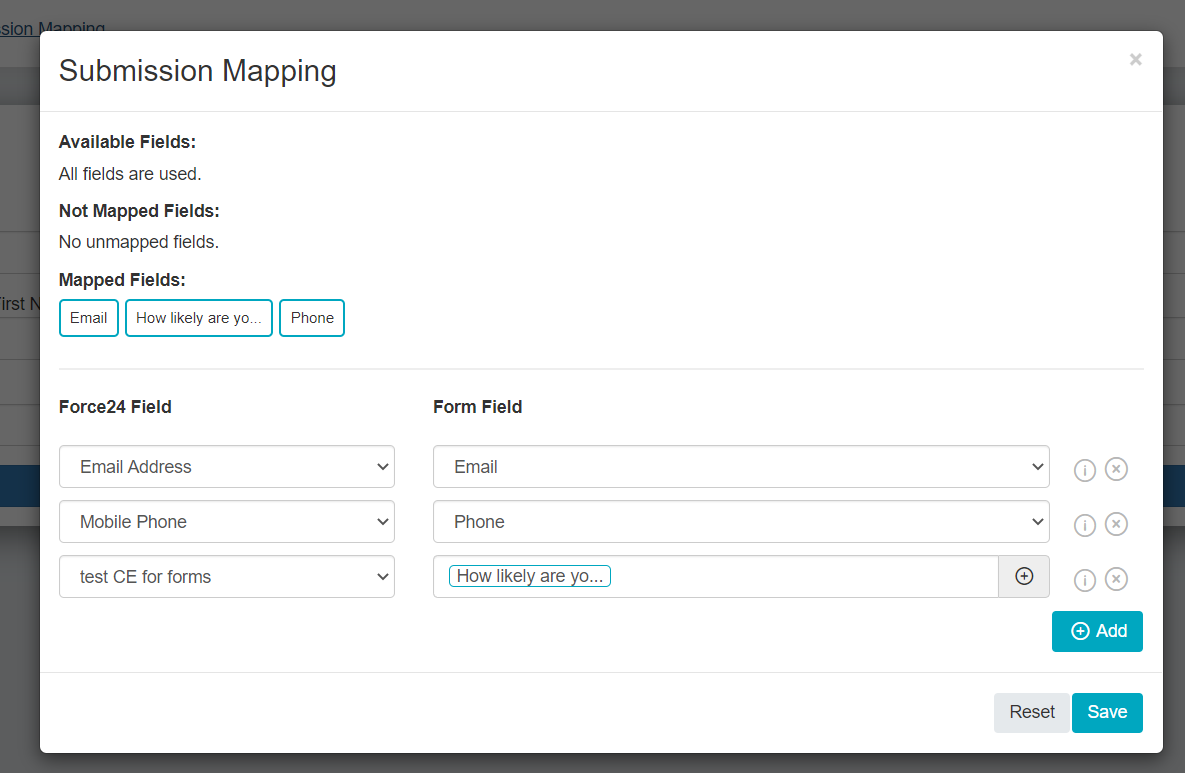
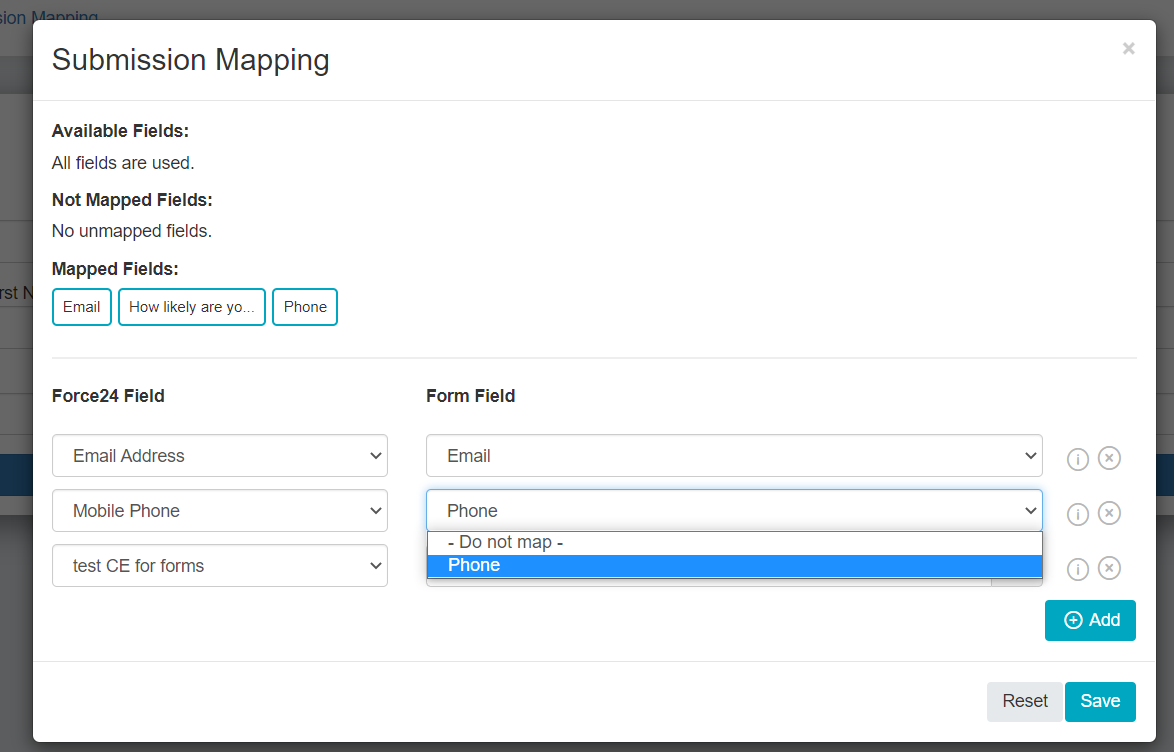
From here, you select the field in Force24 you want to populate from the drop-down menu on the left, and match it with the respective form fields on the right-hand side using the + icon:
(Please Note: You can select 'Do Not Map' if you don't want to store this field in your data).


Please ensure you have used the correct form components for the data you are wanting to map. For example, if you have added a standard text component for the Email Address section, you will see that the submission mapping won't allow you to map this to Email Address in Force24, as it has to be the specific email form field.

You should also check that any custom fields you are mapping to have been created with the correct data type, e.g. number fields should be Integer or Float, and text fields should be Text.
If you see this message when trying to finish your form, this means you haven't completed the mapping.

You will need to map every input to a Force24 field, or specify to not map it at all, so that all field are used:

Once you have finished your mapping, click Save. This will complete the build of your form, enabling it to be selected to insert into your microsite:
If you have any questions, or need any assistance please don't hesitate to contact your Force24 Account Manager, or pop-up on Intercom!
