We've made a few improvements to how you can edit and adjust line height within the email builder. In this article all methods of updating your preferred line height will be outlined.
When you enter your template, to enhance your line height compatibility we will reconfigure the template to use unitless values. For example, where the line height was previously set to px, pt or %, it will now be changed to a unitless value equivalent of the existing line height, such as 1.2. This is because a unitless value will be inherited as-is, meaning the actual value will be recalculated for each element, accounting for the font-size of the element.
The prompt will allow you to view where the line height changes have been made, but there should be no major difference in how the template appears. Should you wish to view the changes made before saving, you can simply press 'Preview [number] changes'.


Firstly access the 'Global Style' mode of your email template.

Then you will see options for editing the global stylings across all snippets in your template, including line height.

By editing the global line height you will be setting a default line height throughout your full email template, and all other set line heights will be ignored.

After selecting your line height, you must press 'Save' to update the line height value (and reset all other line heights in your template).

Editing line height at a snippet level:
Firstly access the 'Layout' mode of your email template.

Once within this section, you can select the snippet you would like to edit the line height of by hovering over, and selecting the 'edit' function on the blue tool bar. If you have a snippet with multiple columns, editing the line height of the snippet will change the whole snippet in it's entirety.

After selecting 'edit' you will see a menu on the right hand side of the email editor that relates to your snippet. Below the 'add column' section you will see the option to adjust 'Line height'. You can then select the preferred line height and click 'reset' before saving this change.

It is worth noting, if you edit global styling after, the line height will default to the global line height and the snippet level line height will be removed.
Editing via the content:
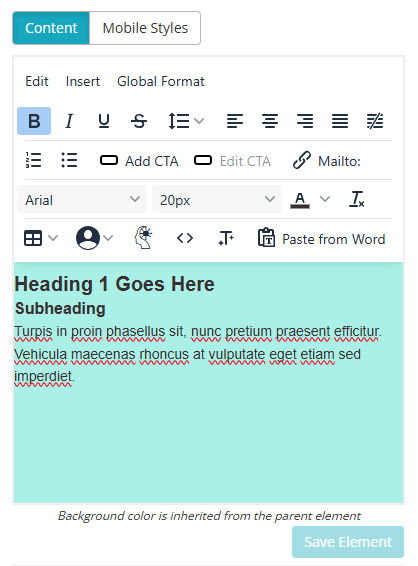
Once you have selected the email template you wish to edit, ensure you are in the 'content' mode at the top of the page:

Select the text you would like to edit by clicking directly on the text box. This will open the text editor panel on the right hand side:

You can change the line height spacing of all the text or only some of the text.
To change the line height spacing of all of the text within the text box, click the global format button:

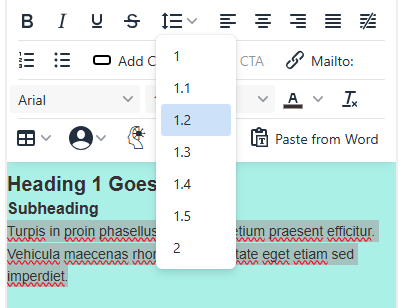
Select line height from the dropdown options and select the percentage you want from the choices.

To change the line height spacing of only some of the text, highlight the text you want to change and select the line height button. Then select the percentage you want.

Then click 'Save Element' at the bottom of the page, you will see your changes in the email template.

NB If you have to set very large line-heights to space your text correctly you may need to set the 'Global Format' Line height to something more appropriate.
