External Data Upload
External Data can be uploaded using two options, via dragging and dropping a csv or xlsx file into the space (similar to the existing process), or using a Google Sheet URL.
In this article it will outline both methods.
Skip to (Needs anchor link once added to the support hub):
Google Sheet
CSV or XLSX
CSV or XLSX upload:
To start, navigate to the ‘Nexus’ page from the left hand navigation

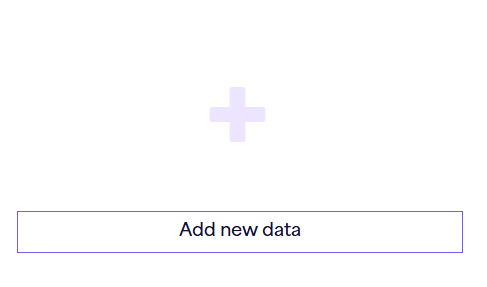
This will take you to the Nexus Dashboard, displaying all created objects. To add data to one of these objects, you will be required to navigate to the Object you wish to upload to, and click the ‘Add new data’ option.

This will take you to your ‘External Data Upload’ Page. Where if you have previously uploaded data, you will see a list specific to that object of all uploads previously completed. This page is also where you can track the progress of your uploads and whether anything could not be uploaded as well as any errors.

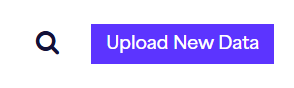
After entering this page, you will need to press the ‘Upload new data’ option to proceed with your upload.
If this is your first upload, you will instead be met with the upload section (similar to a standard data upload). You will arrive at a page with a target to drop your file, (you must use either an XLSX or CSV file).
Drag and drop your file onto the target or double click inside the box to reveal your "file finder" window

Select the file you wish to import. The system will automatically check your files column headers and try to map that to any existing Force24 fields.
If it is successful it will automatically select the data map and map all the fields appropriately.

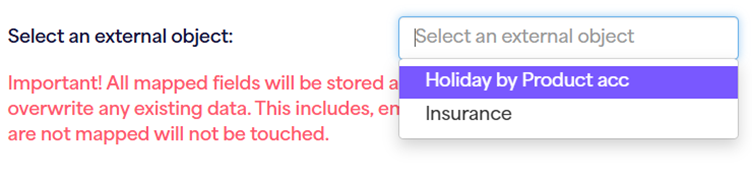
Once your file has been uploaded into our staging area, you will be given the option to choose your external data object that you wish to map this to.
On the right hand panel you will see two columns. The column on the left is a list of all the fields in your uploaded file. The column on the right is the corresponding field within the Force24 platform.

You may decide to change the corresponding field selected to any other not yet mapped field.
Please note: Its not possible to map two columns to the same Force24 field
If you do not wish to use any particular field you may use the -DO NOT MAP- option. This will ignore the field and not import the data held.

Once you are happy with your mapping you simply press ‘Upload’
If you have missed any particular field and not mapped it or elected not to map it, when you come to select the Upload option, the button will not be clickable.
REMEMBER - The Force24 Platform performs detailed checks on every contact you wish to upload. This means it can take up to 3 hours for your data to be inserted. Please be patient and make sure your data is inserted in plenty of time.
Important: All mapped fields will be stored against the External ID, and will overwrite any existing data. This includes, empty cells and blank spaces. Fields that are not mapped will not be touched.
Google Sheet upload:
To start, navigate to the ‘Nexus’ page from the left hand navigation

This will take you to the Nexus Dashboard, displaying all created objects. To add data to one of these objects, you will be required to navigate to the Object you wish to upload to, and click the ‘Add new data’ option.
This will take you to your ‘External Data Upload’ Page. Where if you have previously uploaded data, you will see a list specific to that object of all uploads previously completed. This page is also where you can track the progress of your uploads and whether anything could not be uploaded as well as any errors.

After entering this page, you will need to press the ‘Upload new data’ option to proceed with your upload.

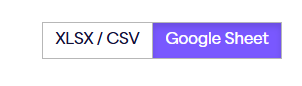
You will arrive at a page with a target to drop your file, to change this view, and upload a google sheet, click the ‘Google Sheet’ toggle button
You will then be prompted to input your google sheet URL

To generate a google sheet URL, please click the ‘share’ option and ensure the access is set to ‘anyone with the link can view’, then press ‘copy’ and input into the option provided.

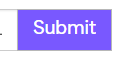
Press the ‘submit’ option beside the generated URL and then select you external object that you are wanting to map to.
On the right hand panel you will see two columns. The column on the left is a list of all the fields in your uploaded file. The column on the right is the corresponding field within the Force24 platform.

You may decide to change the corresponding field selected to any other not yet mapped field.
Please note: Its not possible to map two columns to the same Force24 field
If you do not wish to use any particular field you may use the -DO NOT MAP- option. This will ignore the field and not import the data held.

Once you are happy with your mapping you simply press ‘Upload’
If you have missed any particular field and not mapped it or elected not to map it, when you come to select the Upload option, the button will not be clickable.
REMEMBER - The Force24 Platform performs detailed checks on every contact you wish to upload. This means it can take up to 3 hours for your data to be inserted. Please be patient and make sure your data is inserted in plenty of time.
Important: All mapped fields will be stored against the External ID, and will overwrite any existing data. This includes, empty cells and blank spaces. Fields that are not mapped will not be touched.
**