
Dynamic Segments add and remove contacts automatically, so you don't need to use Journey Manager to keep a Segment up to date. This article shows you how to set one up, how to use Query Sync and how to preview the contacts that match your criteria.
Want to automate more?
If you want to send contacts down an automated path once they join a Segment, learn more in our Journey Manager article.
How do I get started?
Go to Segments, then either create a new Segment or open an existing one. You can open existing Segments by clicking the Open button on the right of their title, or press Create Segment at the top right of the screen to create a new one.

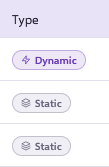
Next to each Segment, the type column shows either Dynamic or Static. Dynamic means automation is switched on, and Static means it is switched off. Segments are Static by default, so a Segment won't update itself until you turn automation on.
How do I create a Dynamic Segment?
Follow these steps to make a Segment dynamic:
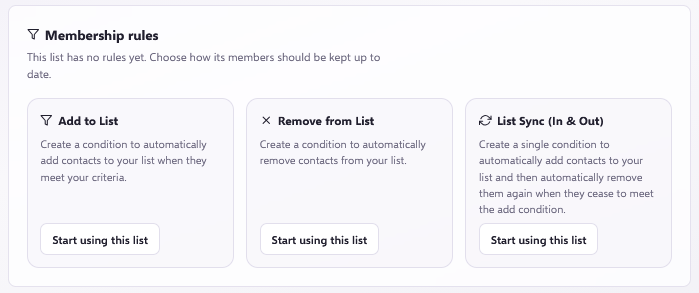
- Open the Segment you want to make dynamic. If it's currently Static, you'll see a Start using this list button in each of three sections. Choose the section that matches how you want the Segment to work:
- Add to List - automatically adds contacts only.
- Remove from List - automatically removes contacts only.
- List Sync (In and Out) - automatically adds contacts, and removes them when they no longer meet the criteria.

- After you click Start using this list, the criteria builder opens.
You'll see the Add to List criteria if you chose Add to List or List Sync (In and Out), or the Remove from List criteria if you chose Remove from List.
Enter your criteria, then click Save Smart Audience.
If it applies to your setup, the Remove from List section will appear once you've saved the Add to List criteria.
You can use separate criteria for adding and removing contacts, a single rule for either, or both together.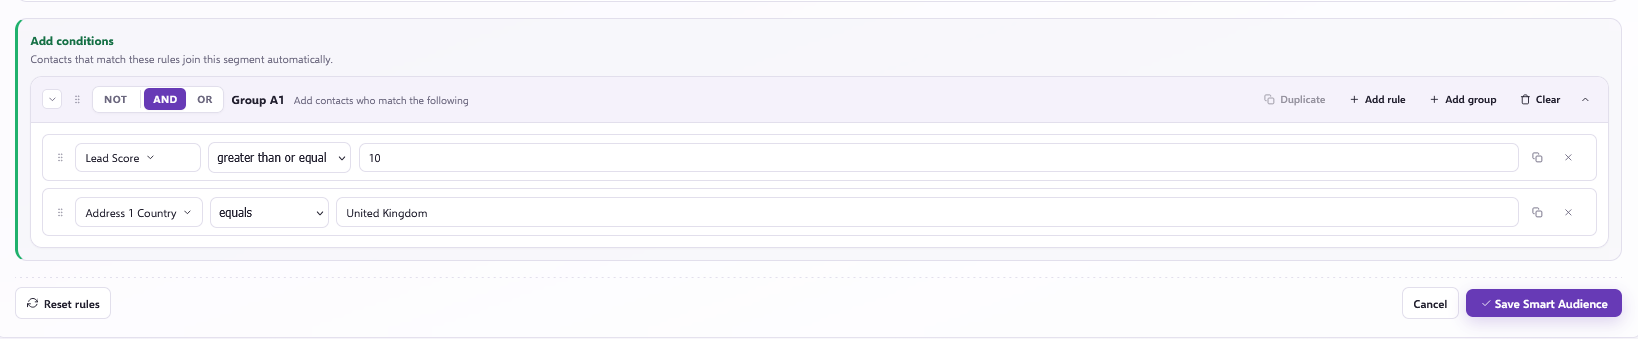
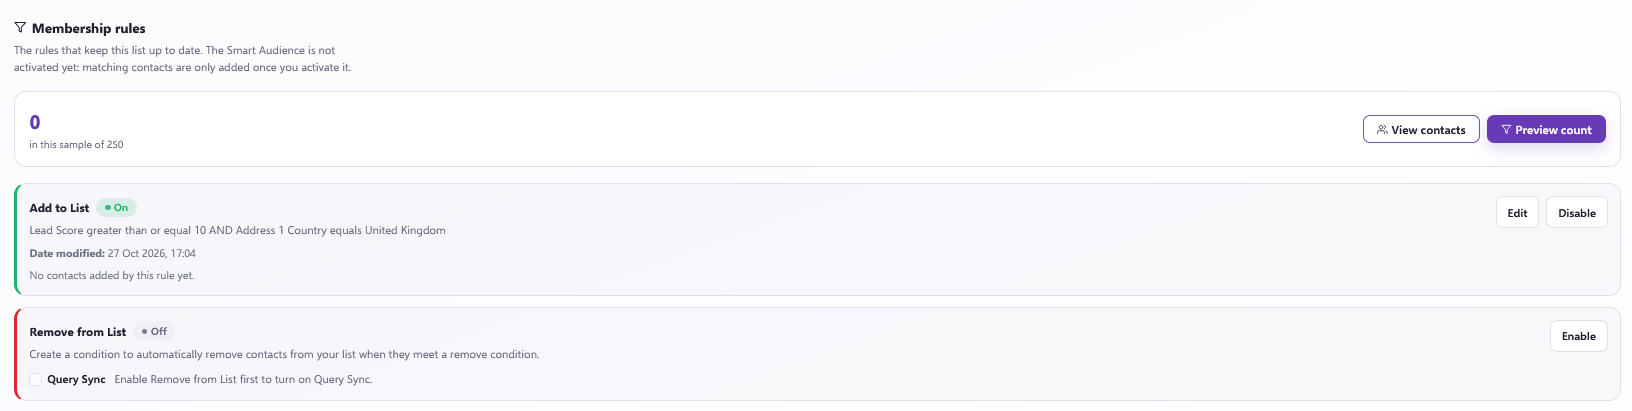
- Click Edit. You'll now have options to:
- Enable or Disable your Add to List and Remove from List criteria.
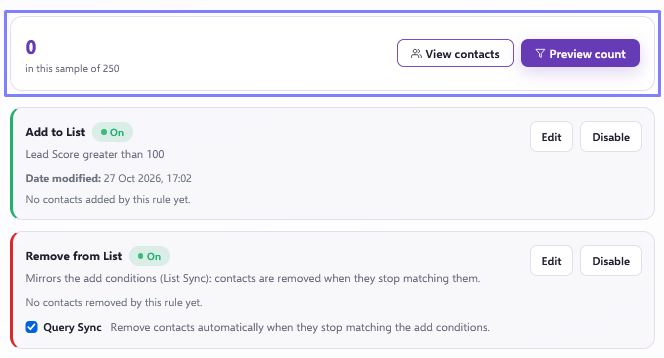
- Enable Query Sync in the Remove from List area. Remove from List must be enabled first, and Query Sync then removes any contacts who no longer meet your Add to List criteria.
- Once your rules are set, click Activate Smart Audience at the top of the page to switch the automation on.
- Above the Add to List and Remove from List sections, you'll see the predicted count for your query. Click View Contacts to open those contacts in Contact Search.
Once the automation is active, you'll see Active instead of Paused at the top of the screen.
Not sure how to write your criteria?
If you're new to building queries, start with our Contact Search - Make Decision Query Glossary article. It explains how each rule works. Then move on to the Group Structures article to learn how to structure queries.
How does Query Sync work?
Query Sync keeps a Dynamic Segment up to date in both directions. To turn it on, make sure Remove from List is enabled, then tick the Query Sync box in that area.
Contacts are removed automatically
With Query Sync on, the Dynamic Segment adds contacts when they meet your Add to List criteria and removes them as soon as they no longer meet it.
What can I do with a Dynamic Segment?
Dynamic Segments are a good fit for audiences that change over time, such as contacts grouped by how recently they engaged.
Want to segment by engagement?
If you want to build tiered Segments based on how recently contacts engaged, learn more in our engagement Segments article.
Once a Dynamic Segment is active, Force24 keeps it up to date for you, so it's always ready to use as the audience for your campaigns.
Need a hand?
If you have any questions, reach out to us on live chat using the chat bubble at the bottom right of your Force24 platform. Our team is happy to help.