
TIP: Journeys can be used for so many things, from sending contacts on rich engaging journeys, keeping your sales team in the loop with CRM updates, profiling data and creating dynamic audience segments. It helps to have mapped your journey out on paper first.
To start go to Journeys in the Automation section in the left menu:
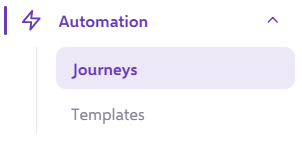
Once you arrive at the page you will see all of your existing journeys. You can search for a journey using the search bar. Or filter for journey's using the 'sort by' functions. The 'Create Journey' button is used to create a new journey.

TIP: You can duplicate your journeys if you have a similar flow in mind to save you some time!
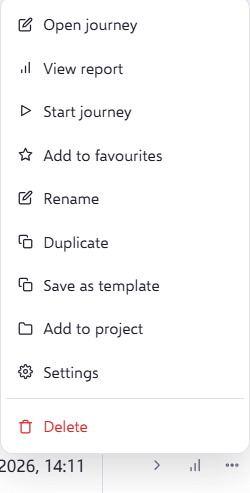
Each journey will be shown with a summary like the version below. Showing the 'Journey name', 'Status', 'Health', contact status and the 'Last changed' date.

Lets start by clicking 'Create journey'. This will trigger a pop up so you can decide upon your journey settings.
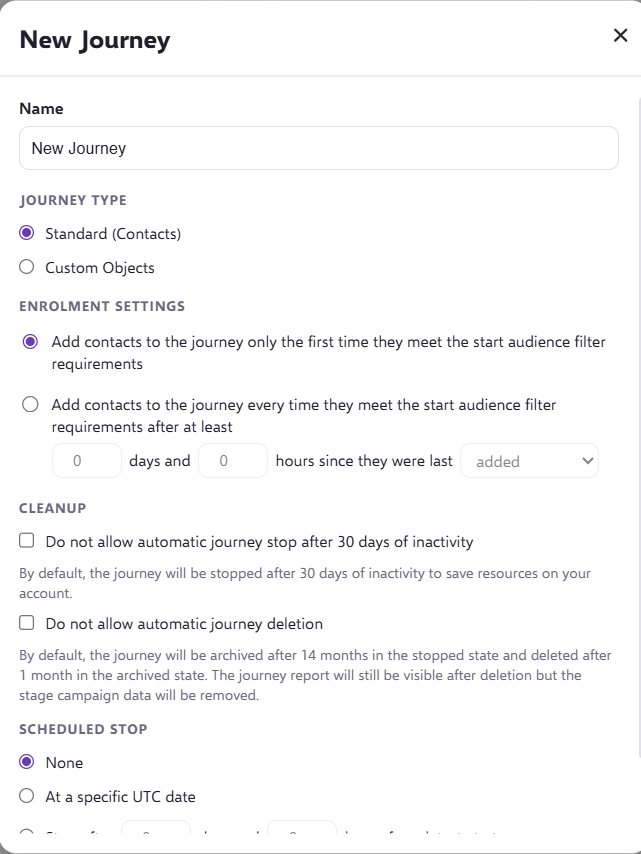
In the 'Journey Name' input, please specify a name to help you understand what the journey does.
TIP: Develop a naming convention to help you categorise your journeys. Start with the audience segment and then its job. I.e. New Customers - Welcome - Emails+SMS.
NOTE: The journey does not need to be unique, however if 2 journeys have the same name it may make it harder for you to edit the correct one.
Once you have provided a name, next move to the 'Enrolment Settings', this is determining how often a user can be picked to go on the same journey.
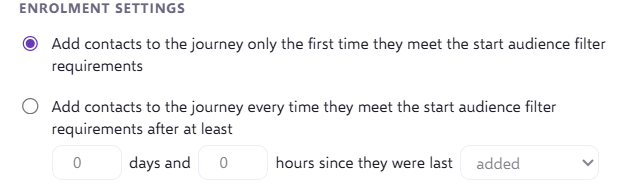
The first option will add contacts the first time they meet the start audience criteria. Meaning that users will only ever be able to run through the journey once using their email address as the unique identifier.
The second option will add the users each time they meet the start audience condition. This means a user may run through the same journey many times, as long as they meet the minimum time lapse since they were last added to the journey, or last completed the journey.
NOTE: This is designed to work in tandem with the start audience condition, for example, if you have a single journey for all new customers but want to send different messages for different types of products purchased, you can set a filter within the start audience to allow the contacts back into the journey but make a decision as to which route they go down. Preventing them from getting the same message again.
Once you are happy, hit 'Create'.
The page will open with a blank journey canvas ready to start.
Your first step will be to create a 'Start Audience':
NOTE: All journeys must have a 'Start Audience' and 'End Journey' condition defined to be activated.
Drag the 'Start Audience' block anywhere on to your canvas:
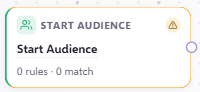
TIP: On the left is easiest for big journeys.
As soon as you drop the start audience, the start audience editor will appear on the right.
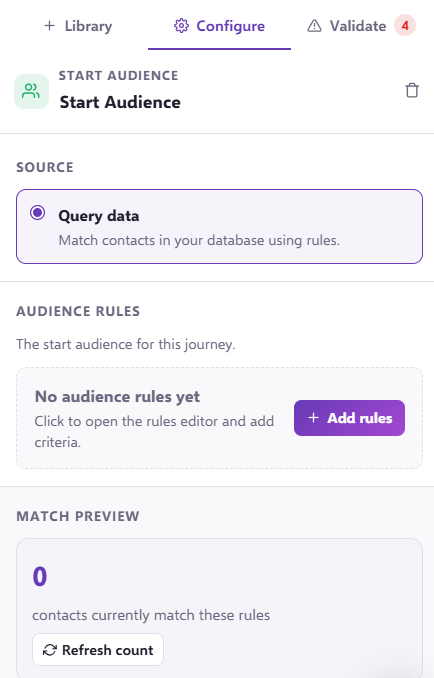
Click 'Add rules' to build your start audience.
If you have asked your Force24 account manager for help defining a start audience, they will have created a query for you and saved it in the 'Saved Searches' drop down.
Once you select a saved query, you will be presented with new options to the right of the drop down.

Append will add the saved query to whatever query you have already built on the query canvas.
Clear and Set will remove any queries you have built and replace with the saved query.
Update query will save any changes you have made to the 'saved' query and overwrite with the amendments.
Save New will create a new saved query which will include the already saved query and any additions made there.
Rename will allow you to rename the selected query.
Delete will delete the query from your saved library.
You can build whatever queries you like using the 'Contact Search' 'Build a Query' section.
Please make sure you understand the principals of "AND" "OR" and "NOT" before building your own start audience.
Once you have built your query, you can click 'Done'.
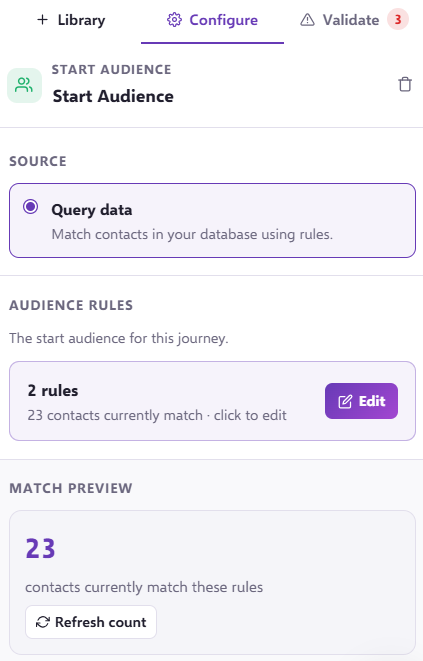
You can then see the total contacts that are included with this query on the right of the screen under 'Match Preview'. If you change the query this will update to show the new total.
Alternatively, you can use 'App Trigger'.
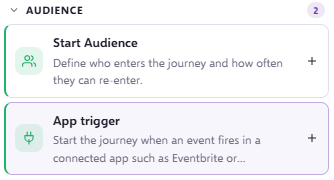
This option allows you to enrol contacts on to the journey based on their interaction with Eventbrite or GoToWebinar.
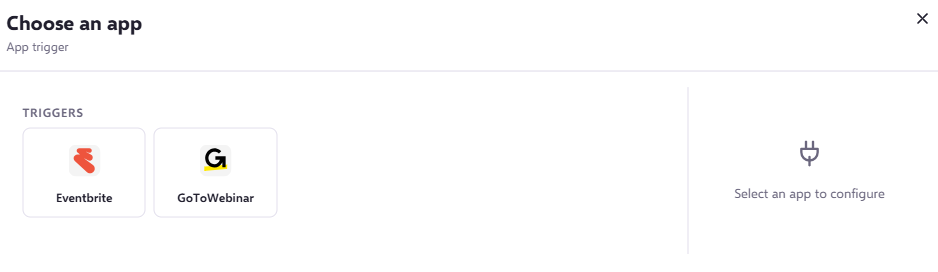
Please see this article for the relevant information to set up Eventbrite: Helpdesk : Force24 Support
Please see this article for the relevant information to set up GoToWebinar: Helpdesk : Force24 Support
You may now drag any component you wish on to the canvas from the Library.
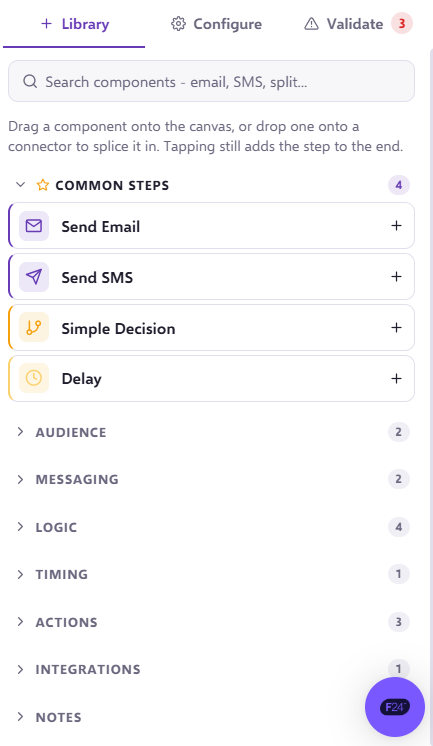
Send Email
Drag and drop your send email component on to the canvas. As soon as you let go the editor will appear on the right.
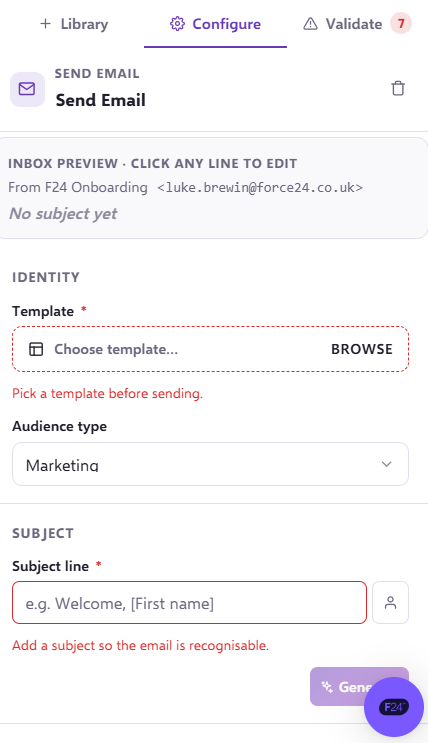
TIP: Its a good idea to first off rename your email stage - this will make it easier later on when reporting. You can do this by clicking on the component 'Send Email' and typing the new title.
You select the template you wish to send from 'Template' on the right. Once selected a preview will show in the component.
You can then select an audience type which will be either 'Transactional' or 'Marketing', the transactional status should only be used if you are sending emails as part of a buying process. This status will ignore the recipients subscription preferences. So if your journey is a delivery notification journey you can still send an email to a user that has opted out of your marketing campaigns.
You then specify a subject line, once you have typed this in you can use the 'Generate' button to enhance it. Within your subject line you may also use place holders to insert dynamic values like 'Name' or 'Company Name' by using the person icon to the right of the subject line.
Standard Personalisation Tokens
[CustomerId], [ContactId], [Salutation], [FirstName], [LastName], [MiddleName], [ContactName], [AddressLine1], [AddressLine2], [AddressLine3], [AddressCity], [AddressCounty], [AddressPostCode], [JobTitle], [CompanyName], [ContactEmail], [Aux1], [Aux2], [Aux3], [Aux4], [Aux5], [Aux6], [Aux7], [Aux8], [Aux9], [Aux10]
You may also add place holders specifically for your data set using contact extension fields.
You may change the 'From Name', this is the name that is displayed in the email browser as being the contact that send it.
Reply address, this is the address that our system will forward all legitimate replies to. This address will not be seen by the recipients.
Send Server, this selection will be either based on the brand you are sending on behalf of or the profile of the server for cold data. Your Force24 account manager can help you here if you are not sure.
Once you are happy and all sections are complete you can go back to library to continue building the journey.
Send SMS
Drag and drop your send SMS component on to the canvas. As soon as you let go the SMS Stage editor will appear on the right.
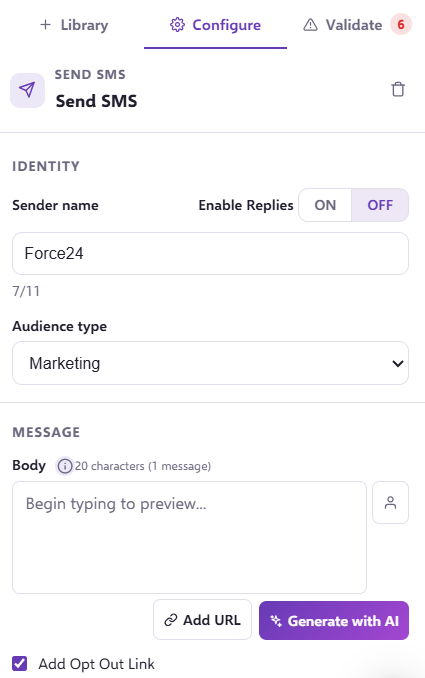
Its a good idea to first off rename your SMS stage - this will make it easier later on when reporting.
You will need to enter a 'Sender name', this is the name that will appear in the users mobile device rather than a phone number. It is worth bearing in mind that there is a character limit of 11.
NOTE: You can not enable the 'REPLY' function if you elect to send from a 'NAME', instead it will send from the designated number.
You can begin to type your SMS message using the token replacement fields available.
Standard Personalisation Fields
[CustomerId], [ContactId], [Salutation], [FirstName], [LastName], [MiddleName], [ContactName], [AddressLine1], [AddressLine2], [AddressLine3], [AddressCity], [AddressCounty], [AddressPostCode], [JobTitle], [CompanyName], [ContactEmail], [Aux1], [Aux2], [Aux3], [Aux4], [Aux5], [Aux6], [Aux7], [Aux8], [Aux9], [Aux10]
To enter a URL that you wish to track use the 'Add URL' function.
URL placeholders [url=http(s)://someurl.co.uk] as in [url=http://force24.co.uk].
This will be displayed in the message as http://sm5.co/xX2Xx where the xX2Xx will be replaced by a random tracing code. This allows is to embed long links into an SMS and still set the tracking cookie.
Opt out
You may place an opt out link in your SMS by using the placeholder [OptOut] or <OptOut>. This will provide an sm5.co shortened link to the users contact preference center. Please also remember to prefix this placeholder with some copy to denote what the link is for.
E.G. "Stop [OptOut]" will become "Stop http://sm5.co/xxxxx" or "opt out [OptOut]" will become opt out http://sm5.co/xxxxx
The preview function will replace the valid place holders with a preview of the data. This will help you make sure you have it correct.
Once again you will need to select an Audience type:
Audience type, this will be either Transactional or Marketing, the transactional status should only be used if you are sending SMS as part of a buying process. This status will ignore the recipients subscription preferences. So if your journey is a delivery notification journey you can still send an SMS to a user that has opted out of your marketing campaigns.
Simple Decision
The 'Simple Decision' component will allow you to make a decision and branch your journey to send users on different routes.
Drag and drop the simple decision component on to the canvas. As soon as you let go the Simple Decision editor will appear on the right.
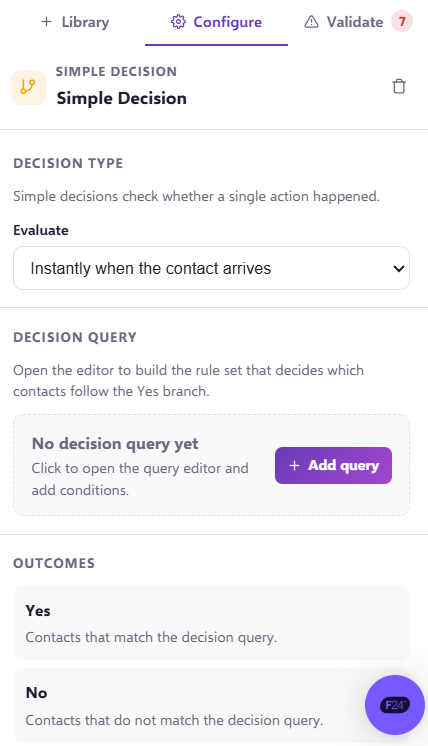
Its a good idea to first off rename your 'Make Decision' stage - this will make it easier later on when reporting.
Decisions are simple YES/NO outcomes. You can connect many decisions together to make more complex decisions. If the user meets the condition they will be sent to the YES branch but if they do not they will be sent to the NO branch.
You have a choice when making a decision, to perform the decision instantly or after a delay.
Instantly when the contact arrives - this will perform the search on the contact the instant it is passed to the make decision stage. This works well when you are branching on a fixed aspect of the contact, such as contacts based in a specific region or a customer status. It will not work well if you are waiting for a contact to perform an action like open an email.
After a dynamic delay - this works more like a time out, by specifying a delay time, the platform will constantly check from the time in which the contact is passed to the stage for the contact meeting the search criteria. If after the delay time the contact does not match the criteria it will send the user to the 'No' branch. For example if your previous stage is an email and you would like to send users that click the email to another email stage saying "HI - thanks for clicking". The people that didn't click should be sent to an SMS stage. You would use the delayed decision, and set the delay time to be long enough for the users to receive the email and click it (say 3 days). The moment the user detects a click it will progress the user to the 'YES' branch irrespective of the delay time, all users that did not click after the 3 days would be sent to the 'NO' branch.
TIP: If you would like all users to be processed at exactly the same time you can combine the delay component with a make decision component that has an instant query.
If you have asked your Force24 account manager for help defining a 'Simple Decision' query on the query canvas, they can create a query for you and saved it in the 'Saved Searches' drop down.
The parameters to select from are available in the query canvas dropdown:
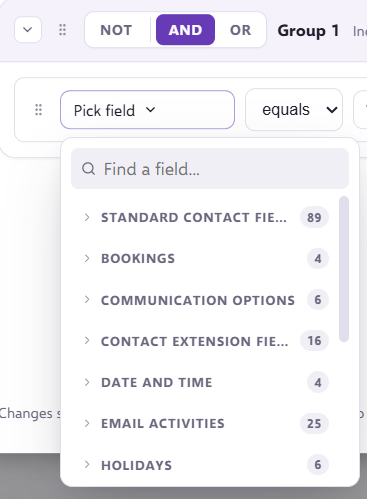
The parameters are categorised:
Standard Contact Fields- These are fields that apply to the contact, such as name address and activities the user may have performed
Bookings - This refers to the specifics around a contacts booking history
Communication Options- This refers to a contacts status availability
Contact Extension Fields - The refers to additional fields including location and validation
Date and Time - This refers to all timings
Email Activities - This refers to the actions the contacts have taken with emails
Holidays - This refers to information gathered while the contact is booking i.e. number of people or lead name
Journey Activities - This refers to the contacts interactions with the current journey overall
Journey Stage Activities - This refers to the contacts interactions with specific parts of the journey
Marketing List - This refers to any marketing list activity for the contact
Popups - This refers to the contacts interactions with popups
SMS Activities - This refers to the contacts interactions with SMS
Web Tracking - This refers to the contacts use of the web
Multi decision
This section shares a lot of features to the 'Simple Decision' but differs in the decision criteria.
Drag and drop the multi decision component on to the canvas. As soon as you let go the Multi Decision editor will appear on the right.
The first step is to chose a field that you would like to filter the contacts through.
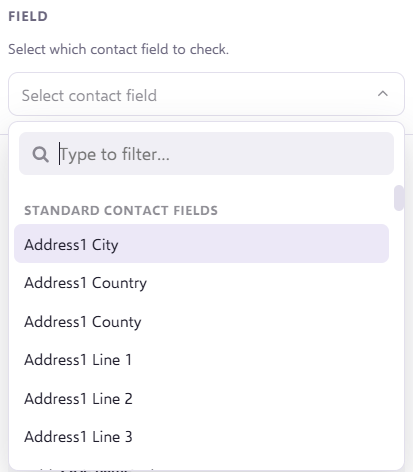
This will allow you to edit the 'Cases'. Give each section an individual 'Case name', choose an option from the 'Operator' and finally add in the value you want the contacts to be filtered through.
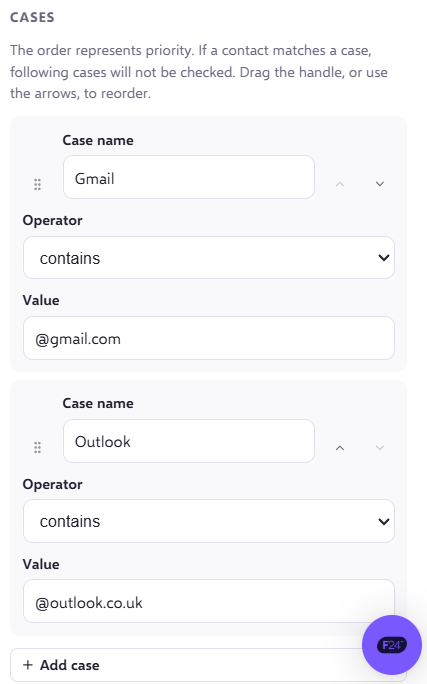
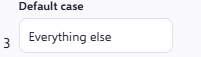
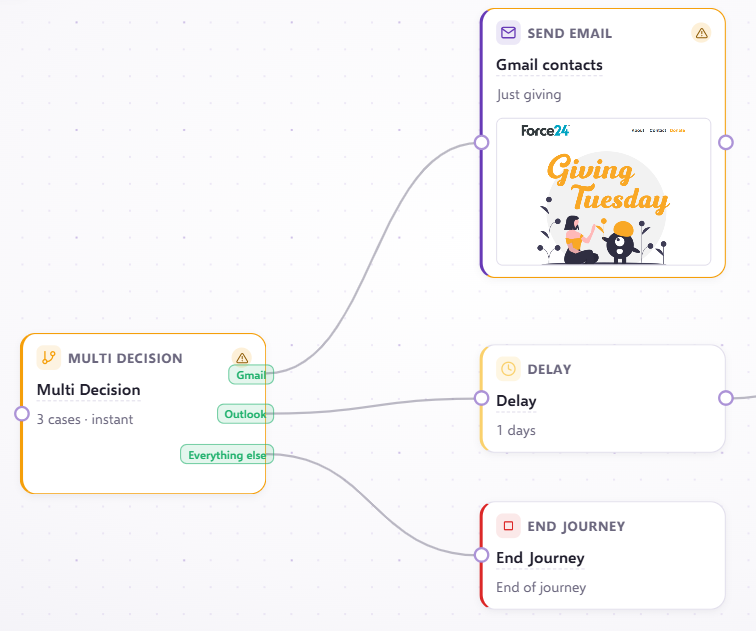
Once you have inputted all the values you wish for the contacts to be sorted by, there is a 'Default case' at the bottom and this will give an instruction to any contacts that meet none of the criteria.
Once all of this is filled in you can link this up to the rest of the journey.
Split
If you would like to split test your audience you can create new branches using the 'Split Function'.
Drag and drop your split component on to the canvass. As soon as you let go the 'Split Stage' editor will appear.
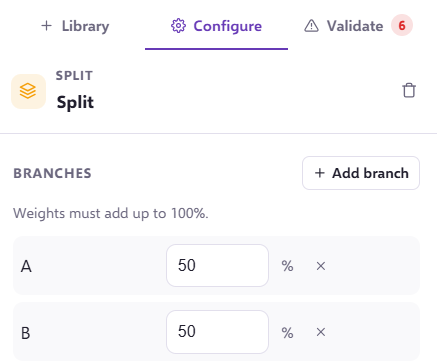
Its a good idea to first off rename your split stage - this will make it easier later on when reporting.
You may split your journey into as many branches as you wish by selecting the 'Add branch' button. Once you have created all the branches you require, simply confirm the % of traffic you would like to send down each branch.
If you make a mistake with your % calculations the system will alert you and prevent you from saving.
Once you are happy and all sections are complete you can continue building your journey.
Set Delay
If you would like to set a delay on your journey to allow time for the user to respond you can use the 'Set Delay' component.
Drag and drop the set delay component on to the canvas. As soon as you let go the 'Set Delay' editor will appear on the right.
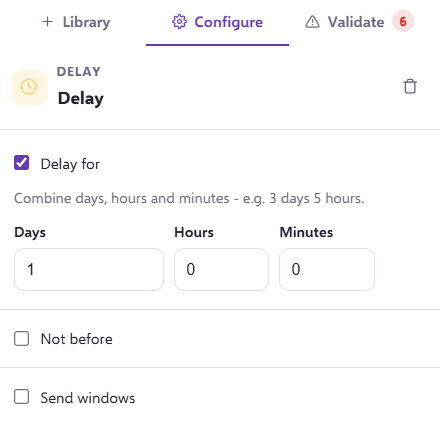
You can then select the purpose of your delay component.
Delay For: The delay for selection allows you to choose to delay contacts for a set number of days, hours, or minutes.
Not Before: The 'Not Before' would allow you to select a 'Date' and 'Time' you would like to hold contacts until. (It is worth bearing in mind that if a contact meets the 'not before' after the date specified, they would run straight past and ignore this criteria.)
Send Windows: The send windows allow you to dictate the number of contacts you would like to push through per hour, the days of the week, and times of days that you would like the contacts to run through the journey at. This allows you to 'throttle' your email journey send.
Action
The components under 'Action' will allow you to "Add to Segments", "Remove from Segments" or change "Subscription".
Drag and drop the relevant component on to the canvas. As soon as you let go the editor will appear on the right hand section.
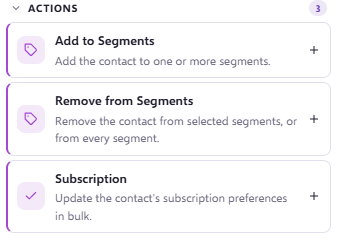
Its a good idea to first off rename your action stage - this will make it easier later on when reporting.
Add to Segment
When you select to Add to Segment, you will be presented with the editor allowing you to select a marketing list to add contacts to.
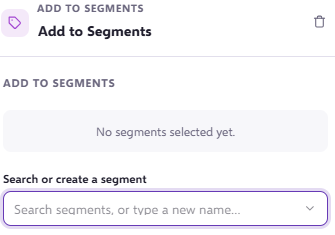
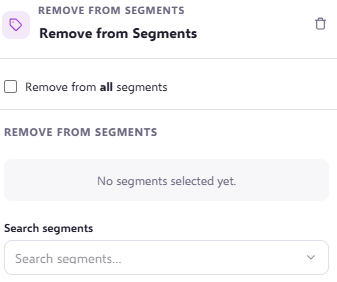
Remove from Segment
When you select to 'Remove from Segment', you will be presented with the editor allowing you to select a marketing list to remove contacts from. There is also an option to remove from all segments.
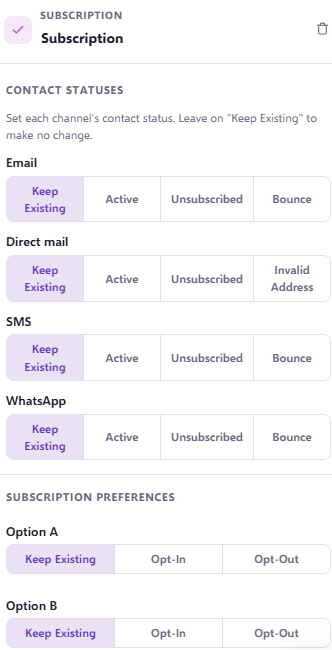
Subscription
Drag and drop the Subscription component on to the canvas. As soon as you let go the editor pop up will appear. In this section you can update the contacts preferences based on their actions
Integrations
If you would like your journey to involve external apps you can do this though the 'App Step' found under integrations.
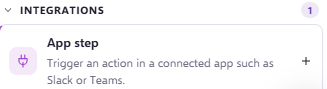
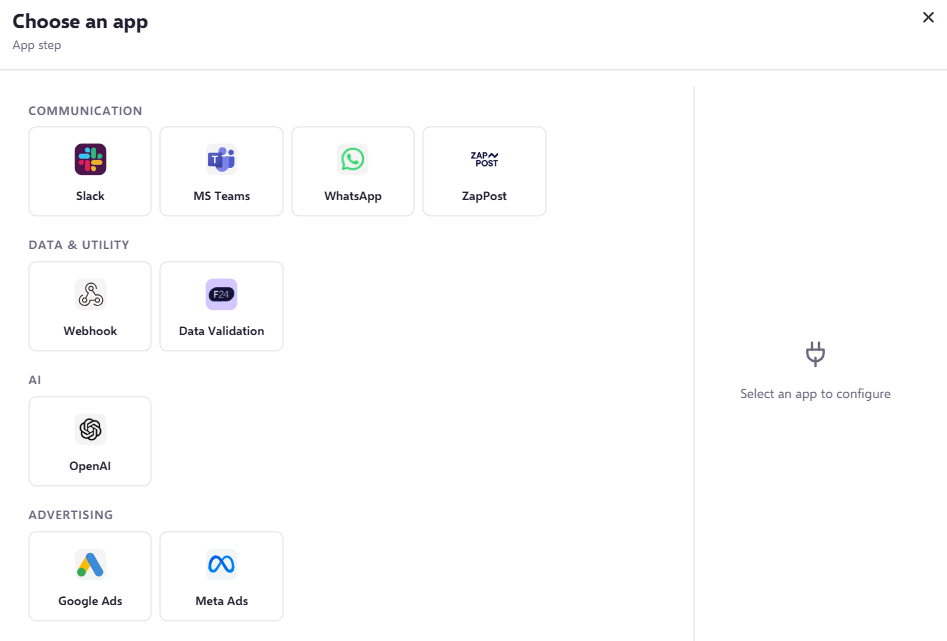 For more help setting up these integrations please find the relevant articles here: Helpdesk : Force24 Support
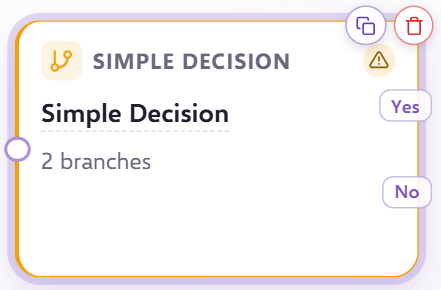
Delete a Stage
To delete a stage from the journey you can do so by selecting the bin icon in the top right corner of the component.
Validate
The journey builder has a validate section alerting you of problems in your journey.
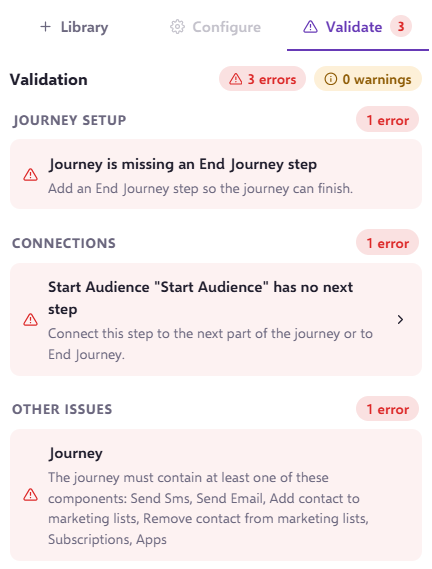
If you click on the Validation Error it will take you to the component causing an issue.
The component will also display an exclamation mark in the top right corner.

When you have corrected all validation errors the journey builder will confirm everything is OK.
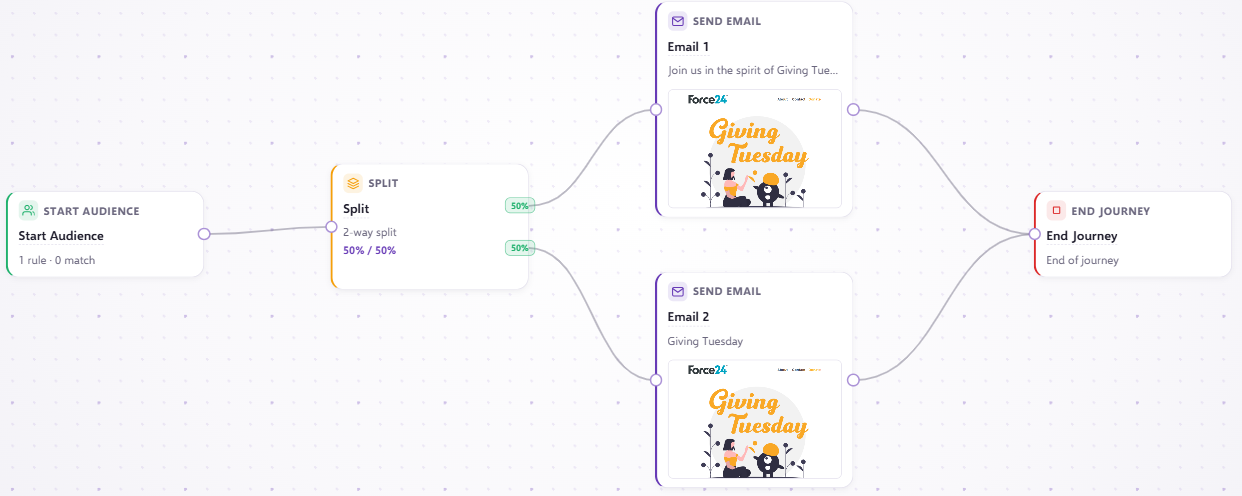
Connecting the Journey Stages
In order for the journey to work you must connect up the stages to give the journey its order.
The journey flows from left to right through the stages.
Turn your Journey On
Once you have completed your journey and all validation errors are complete you may start your journey.
You can click the 'Activate' button in the top right corner.
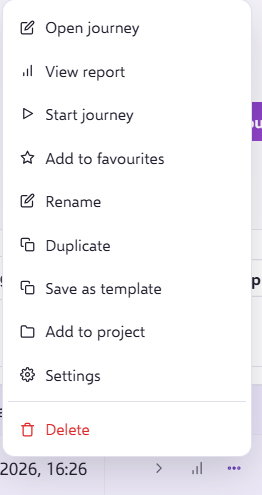
Alternatively, you can go back to the list of journeys by clicking 'Journey Manager' and located the three dots (...) next to your journey name. Once clicked, a menu will come up which will allow you to 'Start journey'.
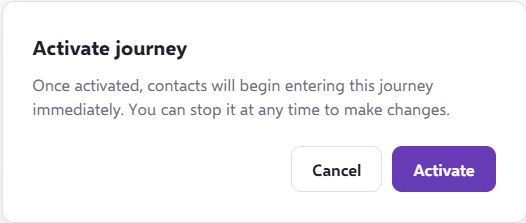
You will be prompted to confirm your request.
Once confirmed you will see one of the following updates:
If you are still in the journey this will appear at the top:
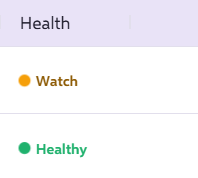
Or the 'Health' will change to 'Watch' then 'Healthy':
You are given confirmation in the 'Status' of 'Running' on the journey.

Congratulations, your journey is now running!
If you have any questions, feel free to reach out to us through the live chat function available bottom right in your Force24 Platform. Our team is ready to assist you and provide support whenever you need it.