A step-by-step guide on how to create a form within Force24.
Here we will show you how to create a new form that you can use on your website or on our Force24 landing pages. If you have already created your form, you can follow the steps here on how to insert these into your microsite:
Inserting a form into a microsite
How to link an external form to your website
To create a new form, firstly you need to click on 'Forms' on the navigation tool on the left hand side.

At the top of the page, click on the 'Create New'

Here you can search in your library for an existing form, or create a new one by entering the form name below

Your form will then open up like the below, if you click on the arrows on the left and right hand side, this will open up the builder 'components' and 'form settings'

Components and Form settings below

If we click on the defaults tab under form settings, here you can adjust the default settings of the form such as font, border and background colours.

To start building out your form, you can do this by dragging and dropping the components in from the left hand side. It is important to ensure that for the field you include match the data types you will be mapping these to for the form to be valid.
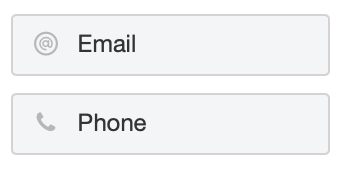
Note: When inserting an Email or Phone field, you'll need to select these specific components from the left-hand menu. If you add a text input field for email, this will show as invalid and not allow you to map this.

Once you have dragged your component across, the example below is the 'Headline Text' component, the edit field opens up for you to add your text, change font, size and add background colours here.
A glossary of these editing terms can be found here (link to glossary article)
If you need to delete a field or duplicate, you can do this by clicking on the three dots in the top right hand side of the edit field.

You can add a placeholder text and an input value in the fields below, you can also choose whether the fields are required, if you need to ensure you collect specific information from the recipients completing this.
You can add, check boxes for single selection queries, multiple selection or have the option to add a drop down menu
Single
Multiple
Drop down

You can also add free text to the form, including adding any links to the text. To do this, drag and drop the 'text' field from the left-hand side, and clicking on the 'create link' on the right-hand side.

You can choose the wording and if you would like this to open up in a new tab or in the same tab on the 'open in' drop down.

This will create the full link in the editor

To amend the form as a whole, if you click on the settings next to the name of the form, this will open up the editor where you can amend the background colours, font and borders.

Once you have built the structure of the form, and made the necessary edits using the Glossary, you then need to decide where you'd like the form fields to 'map' to, in the Force24 platform.
The article here will explain how to do this.

If you have any questions, feel free to reach out to us through the live chat function available at the bottom right, in your Force24 Platform. Our team is ready to assist you and provide support whenever you need it.
